
Thanksgiving is one of my most favorite holidays ever…because it usually means a ton a family and friends getting together and, well, that just makes me happy!
It is also a time to experiment in the kitchen a little bit. I don’t know what it is, but I always feel the need to try out a new recipe or a different way of cooking something on Thanksgiving. I am not sure that this is the best way to go…it’s like opening a live play and you haven’t had the dress rehearsal yet. Not the smartest thing to do, I admit…but so far, I have kept the kitchen catastrophes to a minimum and have actually been rather pleased with some of my experimentation.
One of those experiments was brining a turkey. I love turkey, but the turkey of my childhood was rather dry. This probably explains why I love gravy so much and leftover turkey sandwiches…the dryness of the turkey would be masked by the Costco portion of mayo I would slop on the sandwich.
So why was the turkey always dry and tough? A few reasons, really:
- Overcooking the turkey
There is a tendency to overcook any poultry. We are always so worried about not cooking it enough and so it gets cooked until there is no debate as to whether or not it has been cooked long enough. The reason that there is no debate is because it is dry and tasteless! Well, properly cooked turkey is not dry…just like properly cooked shrimp is not rubbery.
This is why it might be time to invest in a meat thermometer. You can get an inexpensive one for a couple of bucks…so there’s no excuse. If you have more to spend, I recommend getting one that alerts you that you’ve hit your temperature. Here’s one I like for less than $20 (at the time of this post): Automatic Meat Thermometer. Totally worth it!
For turkey, set it for 160°F. I know, it’s not the 165°F you hear about. That’s OK. Take a deep breath and trust me. When you take it out of the oven at 160°F, just watch that thermometer…it will continue to rise another 5-10°F…so you’re set.
- Slicing it the wrong way
You need to slice it across the grain, rather than in line with the grain. You’ve probably heard that, but what does that mean? I’m talking about the grain of the muscle fibers. Think about a whole turkey…if you were to slice the meat right off the breast of the turkey (like we always did growing up), you’re slicing it the wrong way. You’d be slicing it with the grain.
Instead, you need to remove the turkey breast from the bone and then slice it across the grain. An easy way to remember how to do that is to put the removed turkey breast on the cutting board with the more pointed of the breast to your right (or left, if you’re left-handed). You’ll be able to clearly see the muscle fibers will be running left to right. Now that you’ve identified the grain, just start cutting across the grain (or the width) of the breast. If you’re cutting it lengthwise, that’s the wrong way. It works the same for chicken too!
Cutting across the grain cuts it in a way that when you bite into it, you’re teeth just sink into the amazingly tender meat rather than doing all the work and having to break through the muscle fibers. The result is a big difference and more tender meat. FYI: Same deal for beef and pork too!
- Not letting it rest after cooking
Letting meat rest after you cook it is essential. I don’t care if it is a steak you’ve taken off the grill, a chicken breast or a turkey, let your meat rest. For a turkey breast, we’re talking 20-30 minutes.
If you want to experiment as to whether or not this makes a difference, cook two chicken breasts in the oven. When you take them out, cut into one immediately. You’ll see all the juices will run out and you’ll be left with a dry chicken breast. Bleck! Let the other one rest for 10-15 minutes. Those juices that you saw run free from the first one will, instead, be retained and will redistribute themselves…thus, a juicier bird.
- Not brining the bird.
You see, when you heat up a turkey, the moisture starts being pushed out when you reach 150°F. Brining helps to counter that by relaxing the muscle fibers, and giving more pockets where moisture can remain. Again a juicier bird…which is our goal.
These four little tips will help to ensure that this Thanksgiving is a little different than the last one. I remember the first year my dad and I brined the family bird. My sister, Barb, who hates turkey because it is dry and tasteless, actually loved it! Mom and Dad loved it too. One note, if you traditionally make gravy out of the juices of the turkey, brining does affect the flavor, so you may want to explore making gravy a different way…but honestly, most of the reason I used gravy in the first place was to make the dry bird palatable. Not anymore.
This recipe for the Perfectly Brined Roasted Turkey Breast will easily serve four to five people with all the Thanksgiving Day trimmings. It’s so convenient and you don’t have to worry about all the hassles of a whole turkey. If you’ve got more folks coming over, think about cooking two half-breasts or making a whole turkey breast. Just increase the recipe for the amount that you’re cooking. And if you want to make a whole bird, this brine will work great for that too!
I’m telling you, Turkey Day will forever be changed when you start brining your turkey or turkey breast…and it will just give you one more thing to be thankful for!
Happy Thanksgiving, y’all! Be sure to leave a comment below and share with us some of the things you’re most thankful for this Thanksgiving!
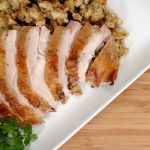
Perfectly Brined Roasted Turkey Breast
Ingredients
SO WHAT YOU'RE GONNA NEED IS:
- 3 lb. Bone-In Turkey Breast
- To taste Olive Oil
Brine:
- 2 quarts Water
- 1/4 cup Salt
- 1/4 cup Brown Sugar
- 1 Orange
- 2 cloves Garlic
- 1/2 teaspoon Peppercorns
- 1/2 teaspoon Dried Thyme
- 2 Bay Leaves
- To taste Pepper
Instructions
Create the Brine
- Heat up about 2 cups of water in the Microwave until it comes up to a boil.
- Add Kosher Salt, Brown Sugar, Peppercorns, Thyme, Bay Leaves to the water.
- Smash Garlic Cloves and add to the brining mixture.
- Slice off the rind of the orange and add to the brining mixture. Stir until the Salt and Brown Sugar dissolve.
- Add the juice of the orange to the brining mixture.
- Let it cool to room temperature. (Note: if you have ice, it is better and quicker to add ice to speed cooling and make it colder than room temperature)
Brine the Turkey
- Place Turkey Breast in a Gallon-sized (or larger) sealable bag.
- Pour cooled brine over the Turkey Breast
- Top the bag off with water (about 2 quarts total of brining mixture and water)
- Let marinate in the refrigerator overnight (12-18 hours is great).
Cook the Turkey
- Preheat oven to 450F.
- Rinse the brined Turkey Breast in cold water.
- Thoroughly dry it with a Paper Towel. This will help it crisp and brown the skin.
- Drizzle the Turkey with Olive Oil, using a Basting Brush to spread it around evenly.
- Season with Salt and Pepper.
- Place Turkey in preheated oven, and turn down the oven temperature to 350F. Cook until the internal temperature reads 160F
- Remove from oven and let the Turkey rest for about 20-30 minutes. Note: This will bring the temperature up 5-10 and the internal juices will redistribute, keeping the Turkey nice and juicy)
Leave a Reply